2.2 Technical Tips – Aperture
Our fourth assignment in my course called INDOOR SELF-PORTRAIT PHOTOGRAPHY by photographer Taya Iv, was to play with aperture by taking at least five different shots at different apertures. Iv described aperture as controlling how blurry your background is.
I do know this concept in that I can do it, but admit my dyslexia has always made being able to explain this concept to others a bit difficult for me. So, for each photo in this assignment I’m going to also provide a brief summary of what happened with each shot as I closed down my aperture over the different shots. The photos are as I shot them in my camera, I’ve done no post processing to them other than write on them the technical setting details for reference purposes only…
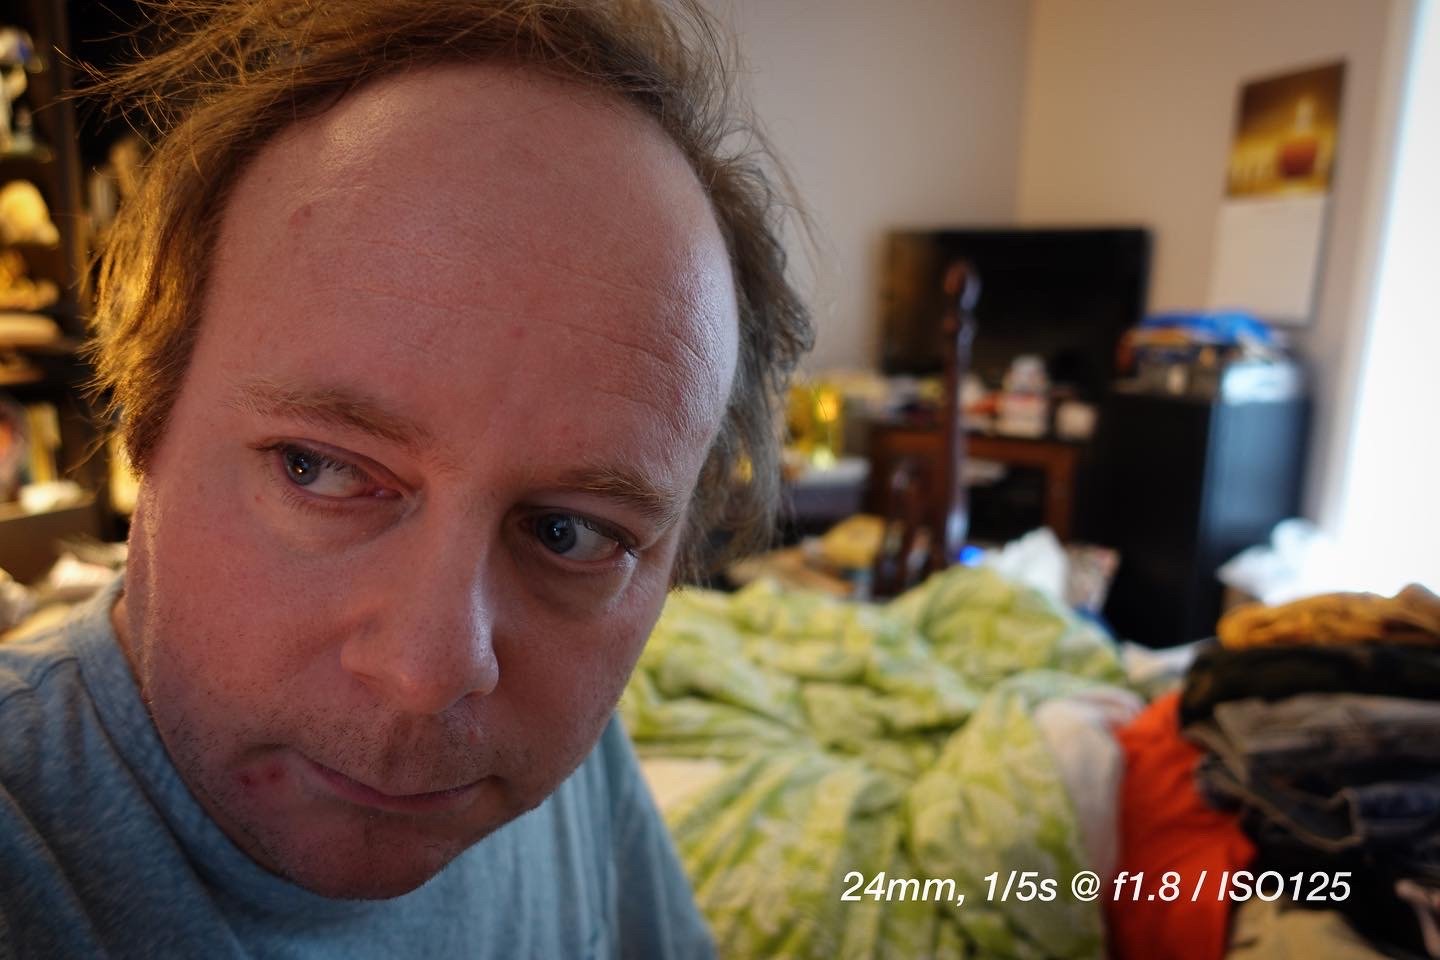
PHOTO 1
24mm, 1/5s @ f1.8 / ISO125: the background is blurred out due to the wide open f1.8 aperture, the maximum aperture of the lens on my Sony ZV-1 Camera I’ve been using for these little projects.
PHOTO 2
24mm, 1/4s @ f2.5 / ISO125: the background is still blurred out due to the f2.5 aperture, which is closed down a bit from the aperture of f1.8. But it’s not as blurred out as I can see more sharpness and clarity in the bedding and clothing piled on the bed, which means the depth of field is increasing, allowing one to see more things that are less blurry, further into the picture frame.
PHOTO 3
24mm, 1s @ f5.6 / ISO125: the background is more sharp and clear up to the bookcase with the calendar above it, just in front of the television on the corner. The bedding is sharp and more detailed as well. Overall, these settings increased the depth of field in the image (I should note that for all of these shots I did use a tripod with remote, as the shutter speed went into the seconds due to the ISO setting I was using of 125).
PHOTO 4
24mm, 2.5s @ f8 / ISO125: now the image appears sharp throughout to the back of the room, although some items on the desk and on the tv stand closest to wall could be sharper.
PHOTO 5
24mm, 5s @ f11 / ISO125: with the aperture now closed down to f11, the image has the greatest sharpness and clarity when it comes to viewing the image’s depth.
To go to f16 at this ISO though would have been difficult as it’s hard to sit still for even 5s. So I’d have to change the ISO to something like 400 or maybe even 1,000 to have f16 at a more appropriate shutter speed for myself as a model. When I zoom in on this photo, I can notice a slight fuzz to my hair and skin which means I likely moved ever so little in taking this 5s exposure.
INSTRUCTOR FEEDBACK…




Extras…
The following are some good videos and links about the topic of aperture…
