SKILLSHARE - “Sort” - SELF PORTRAITS: TELLING YOUR UNIQUE STORY

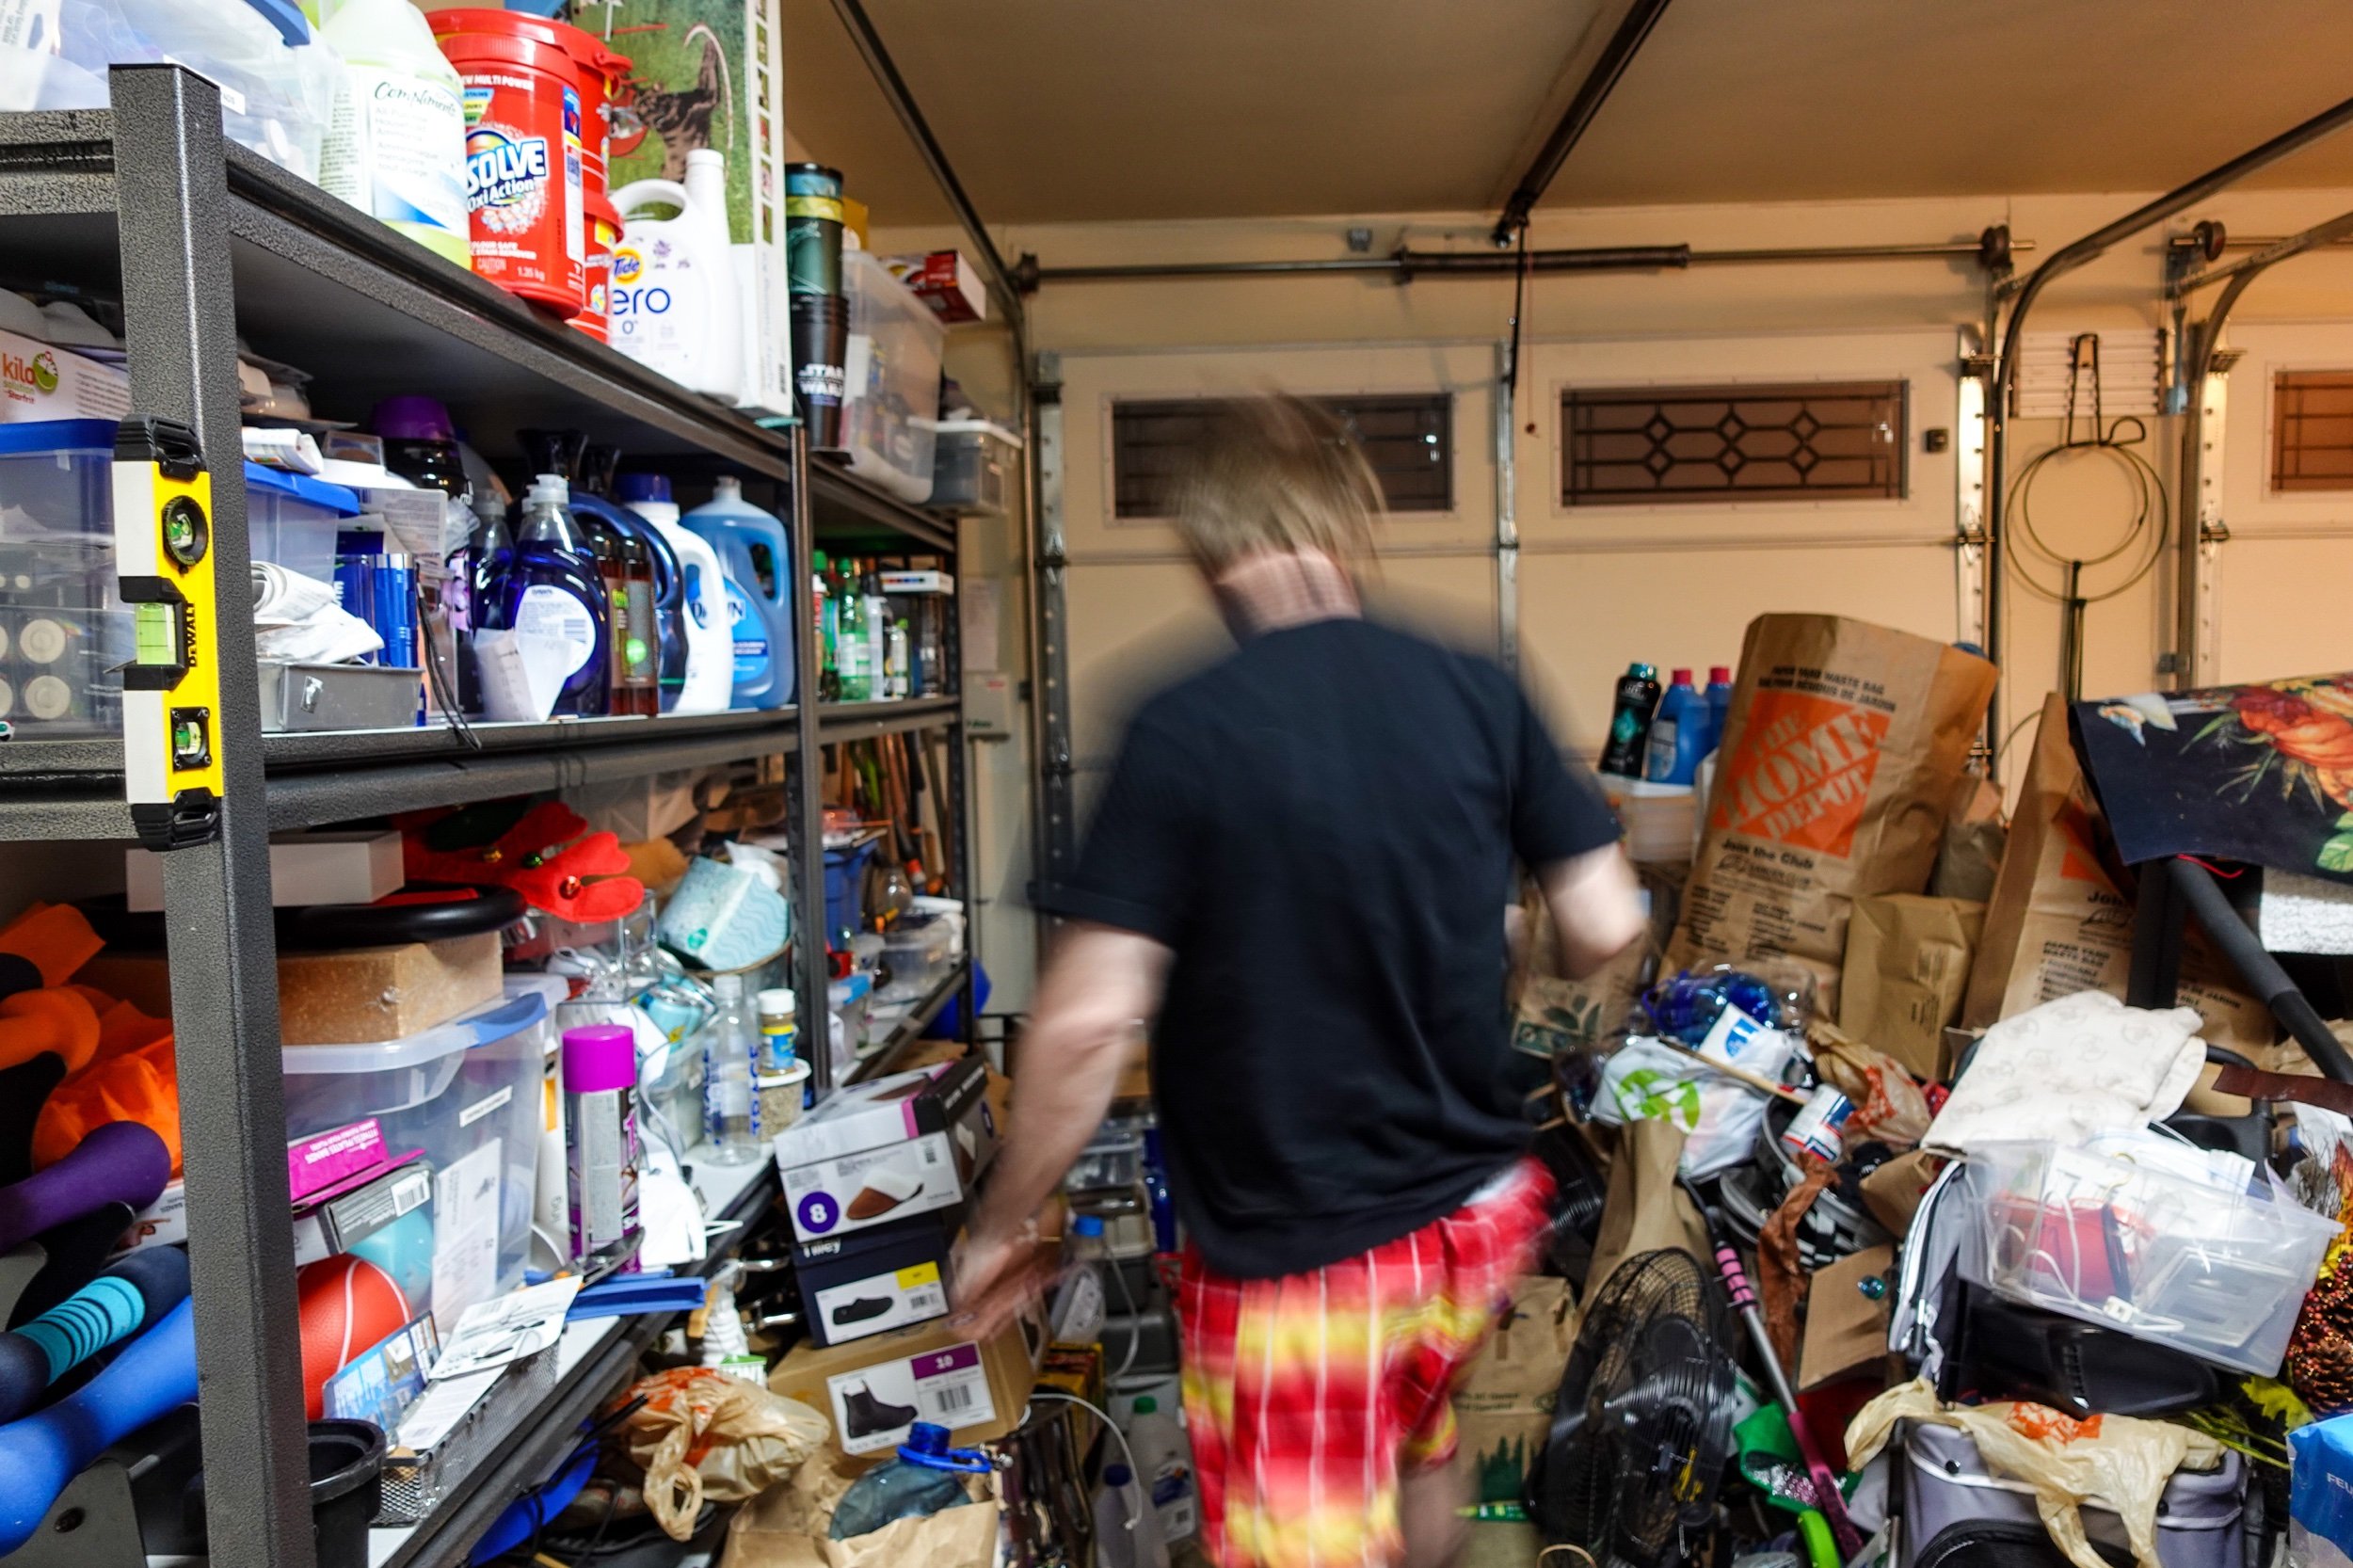
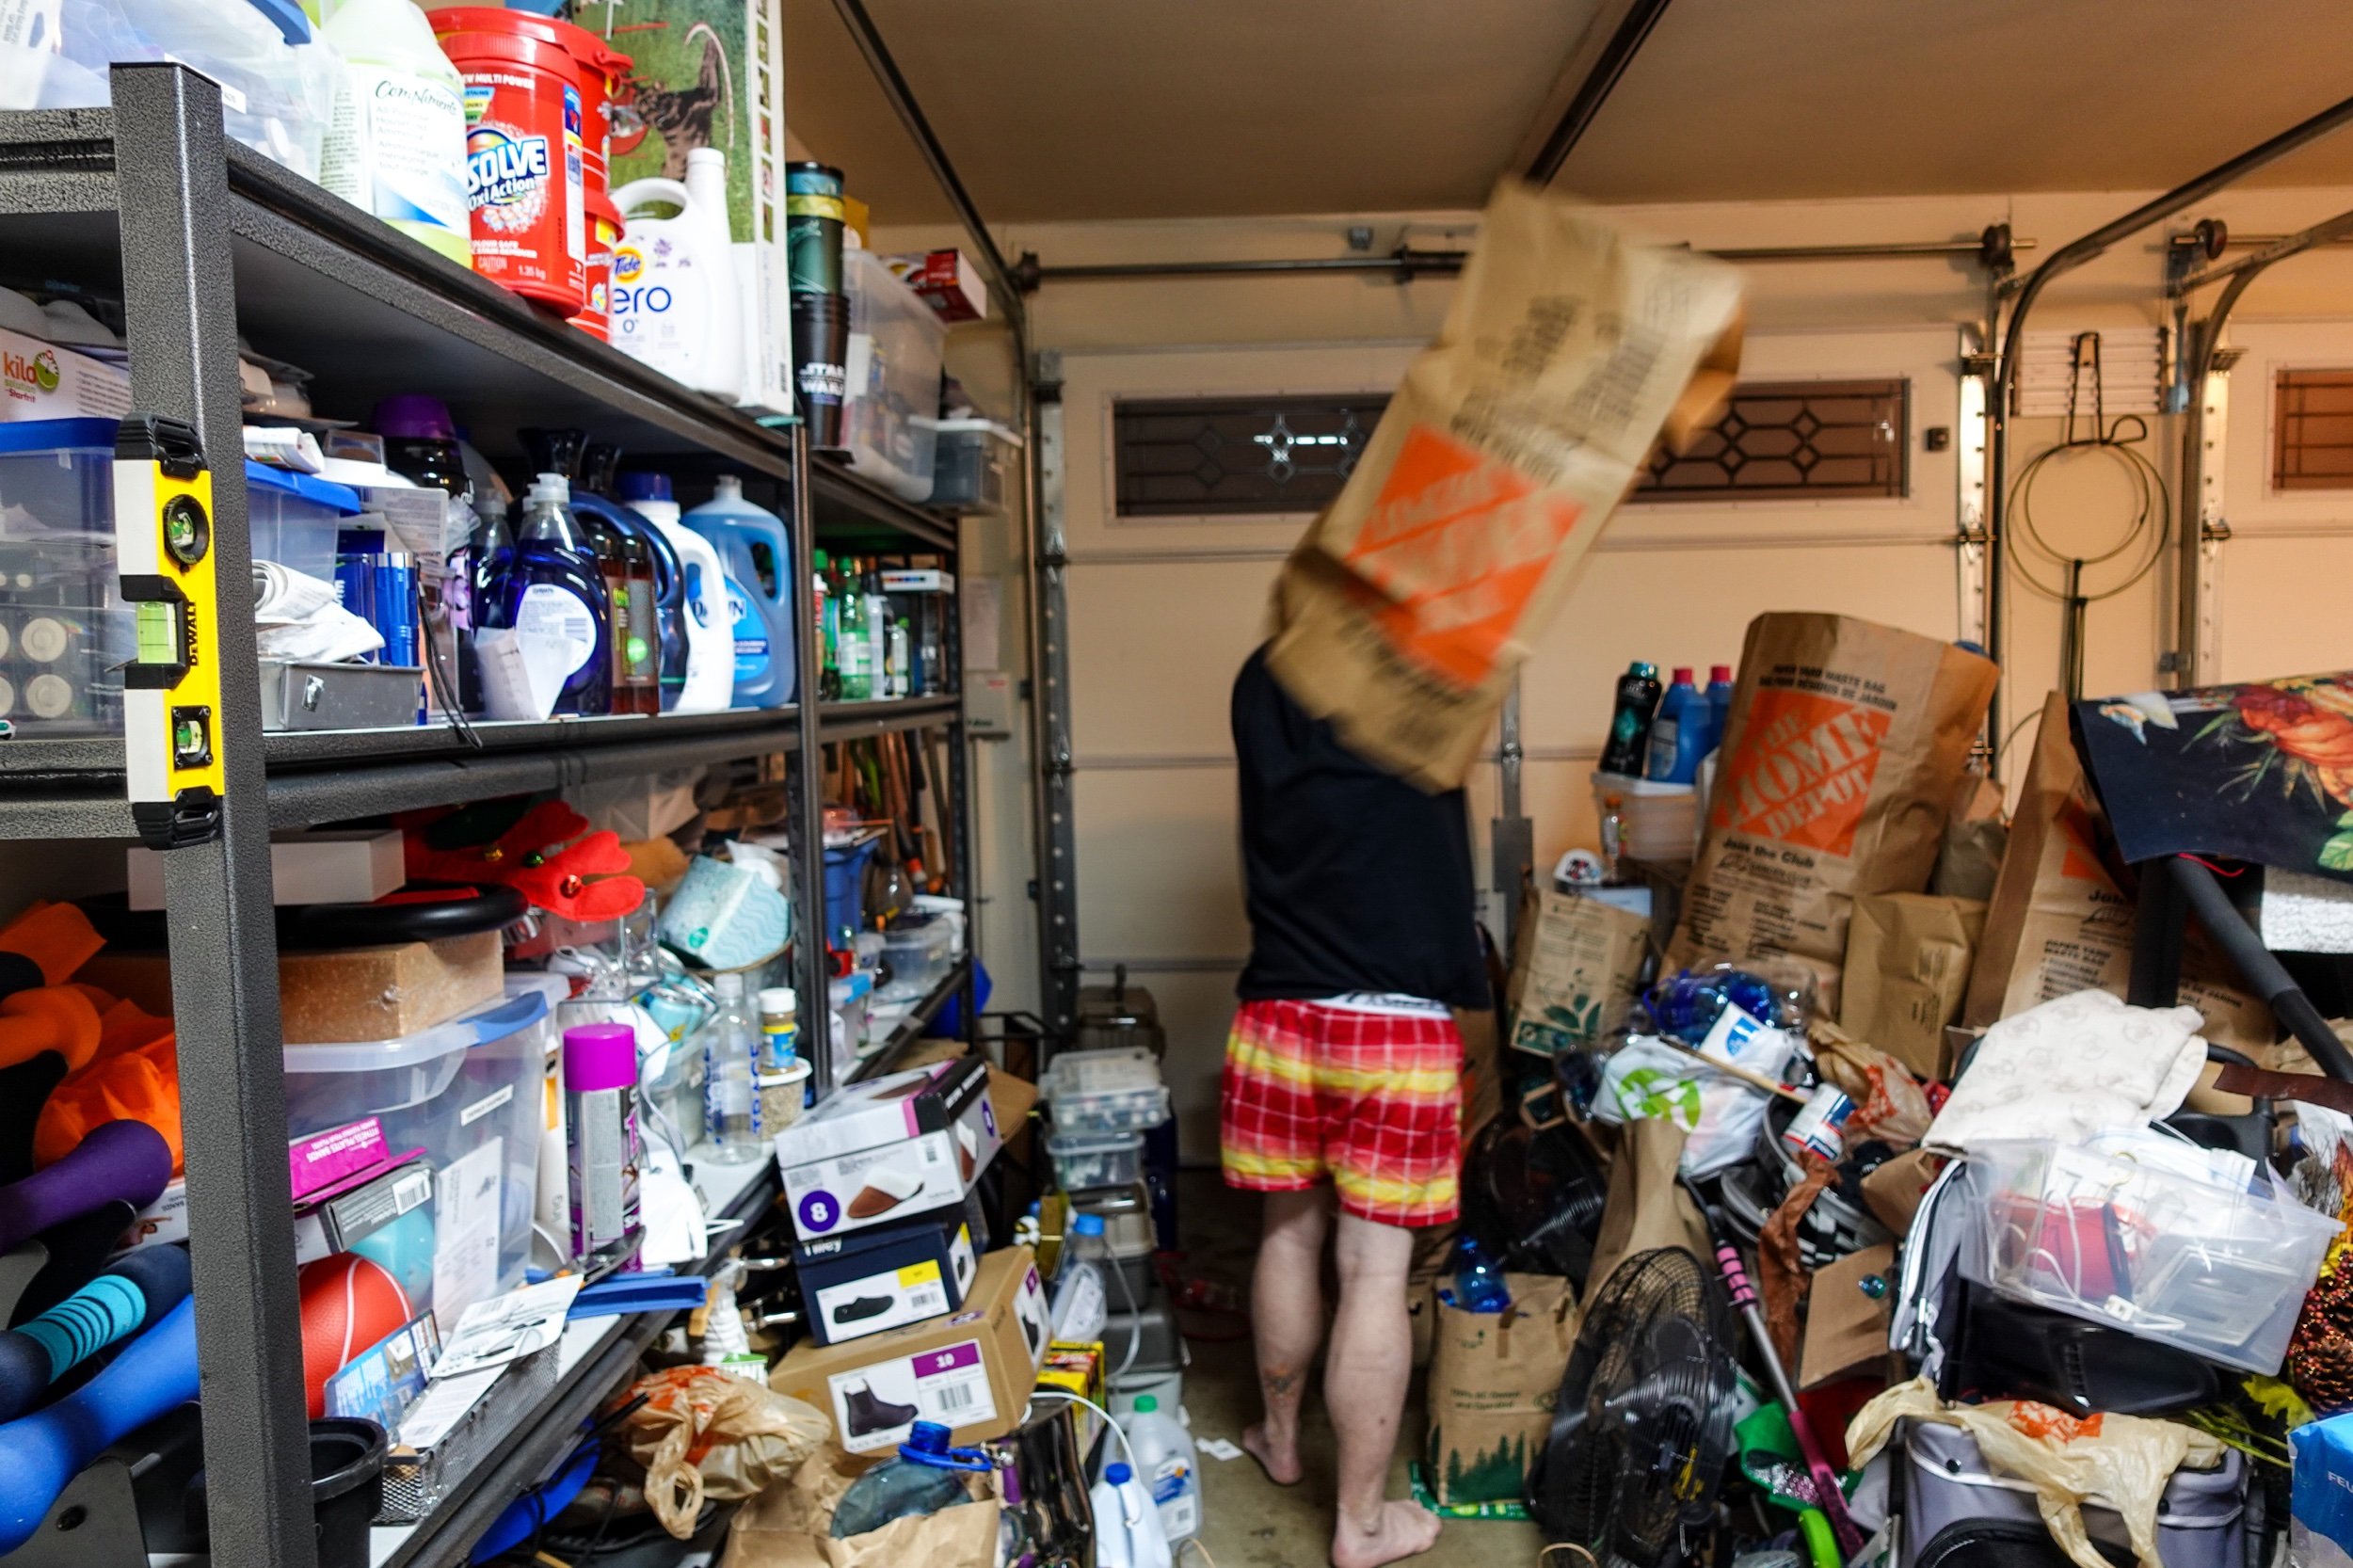
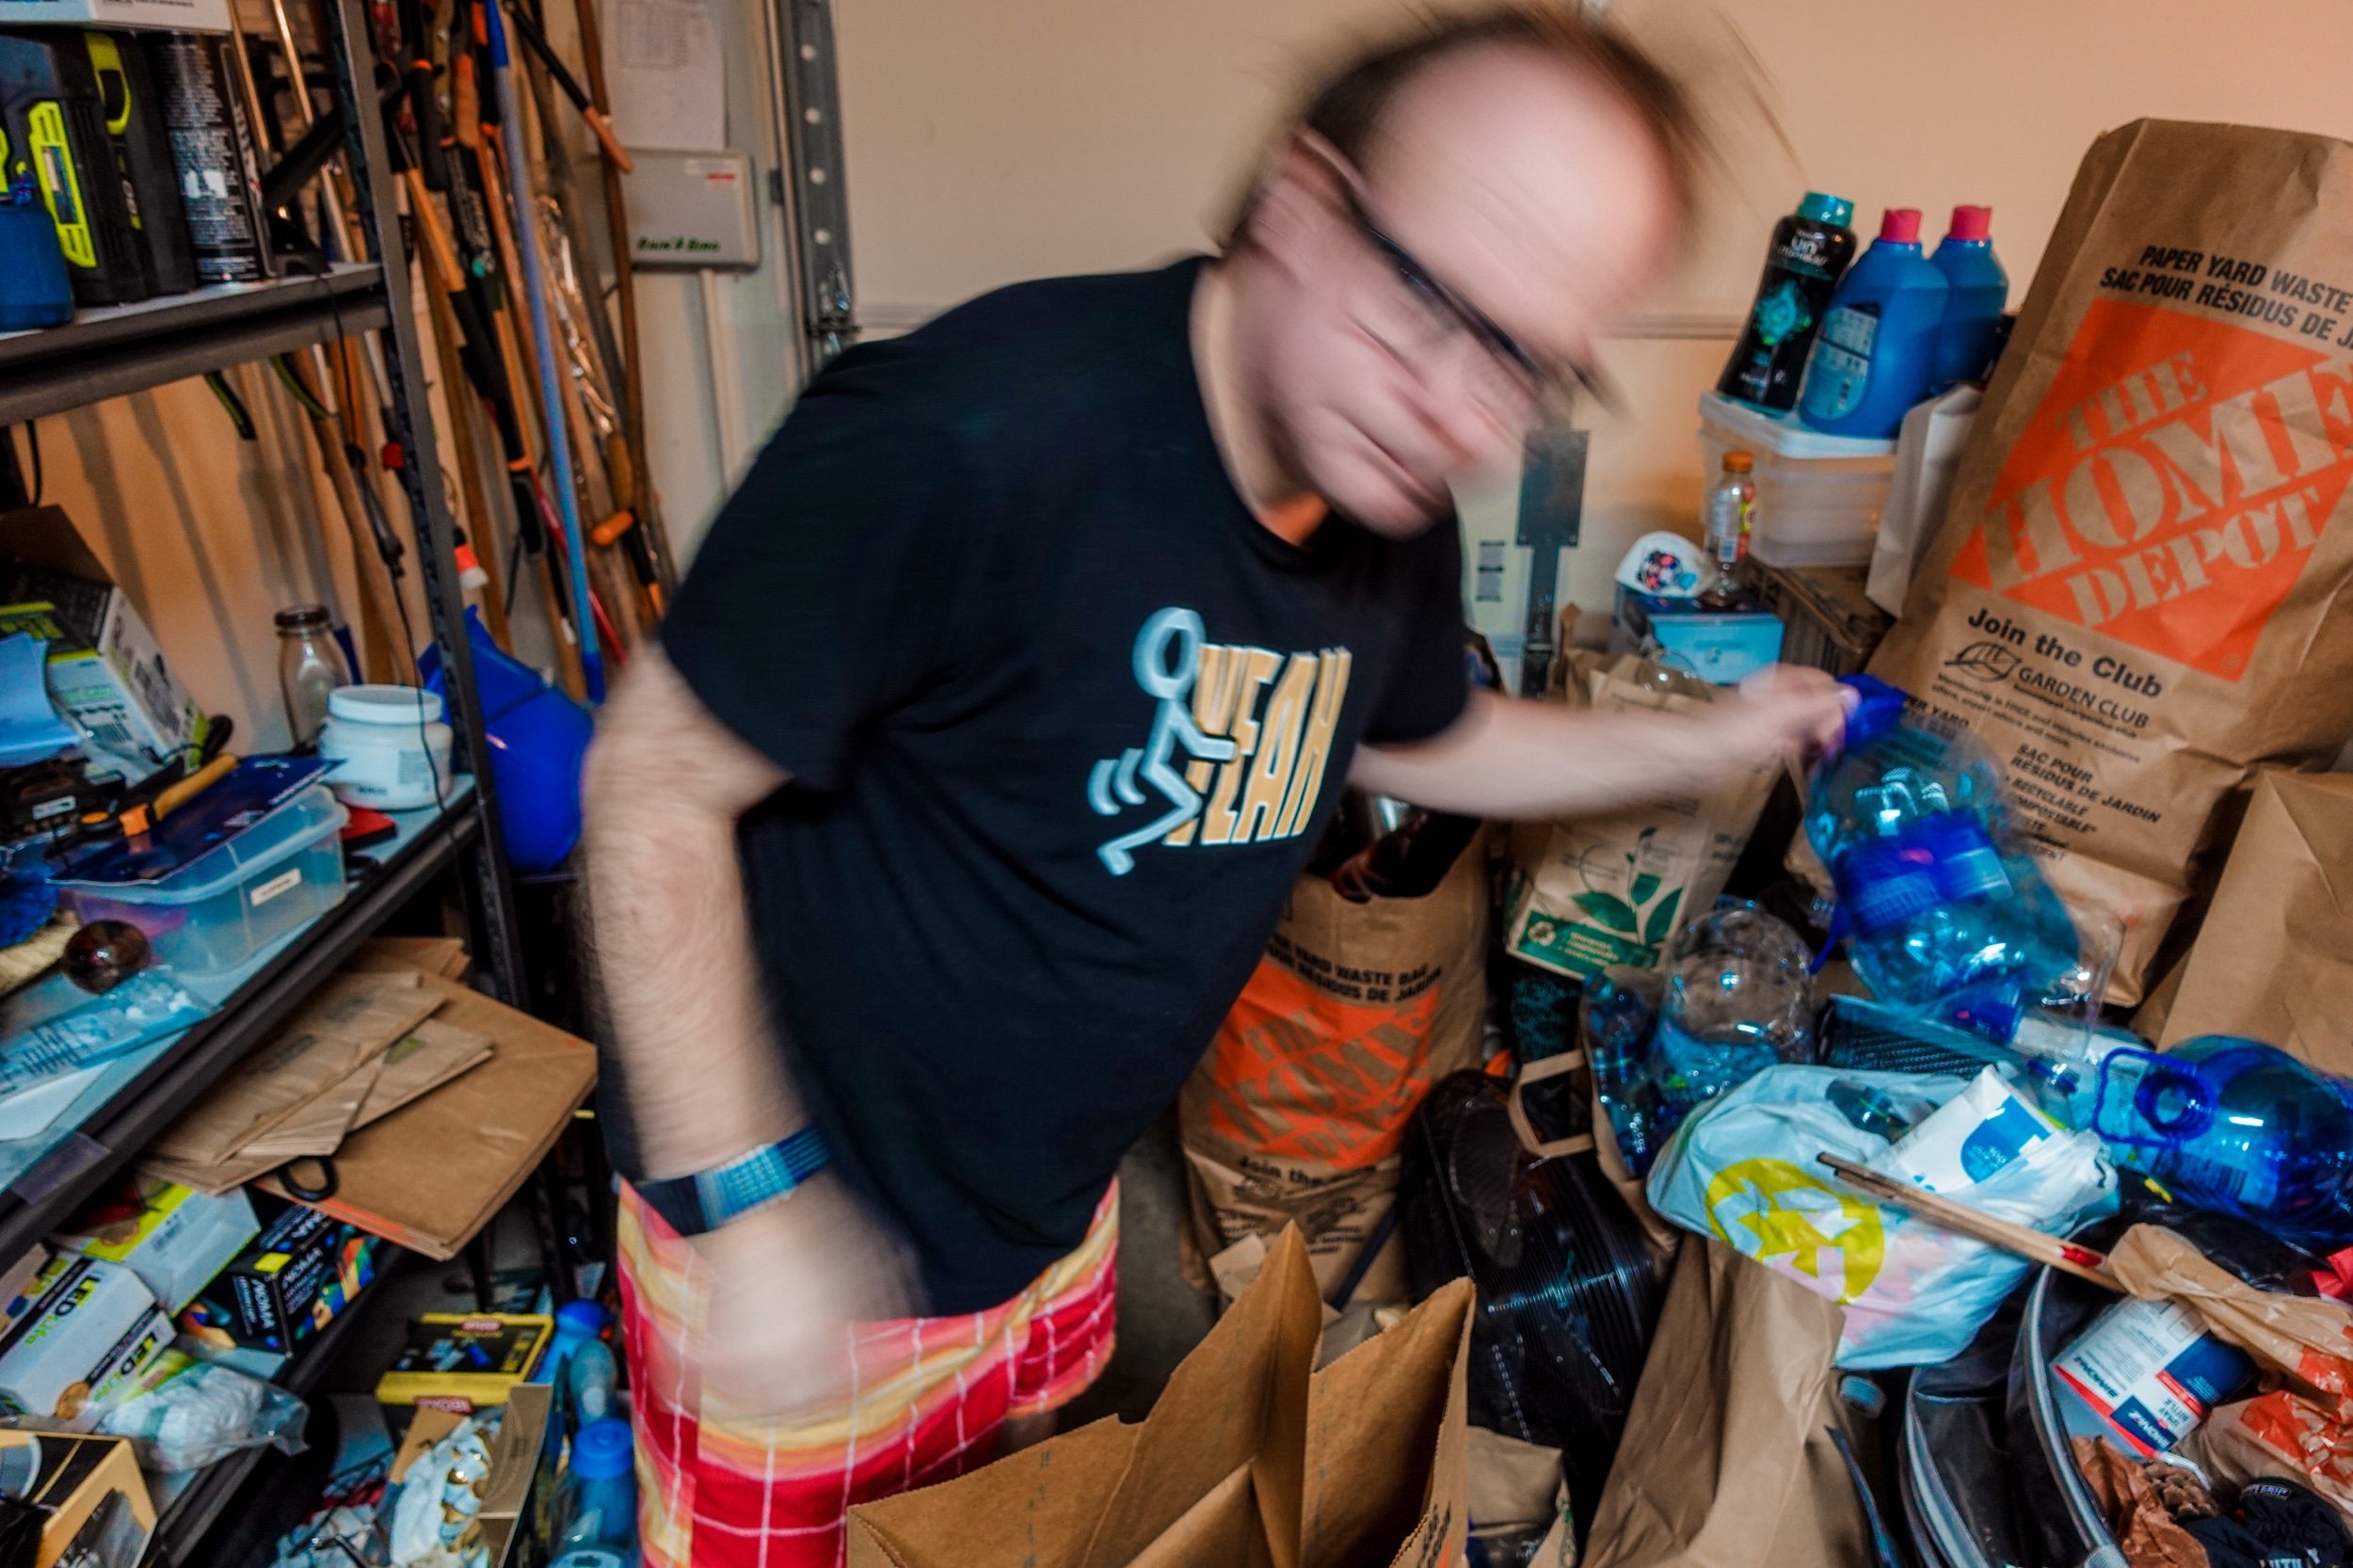
Today, I completed a short workshop on Skillshare called SELF PORTRAITS: TELLING YOUR UNIQUE STORY, by photographer Tabitha Park. Specifically, my project expresses the story of my ongoing struggle to organize my house.

Brainstorming…

In my word web, mind mapping / brainstorming session I thought about several possible projects including spending more time with my dog Kira, after having had to put down a second dog I had, Chanel, after a cancerous golf ball like tumour was discovered. A second project involved possibly photographing myself clearing snow. And then this idea was there too. I’ve photographed this part of my life before, but I’m becoming more determined to actually do something about it now.

Artist’s Statement…

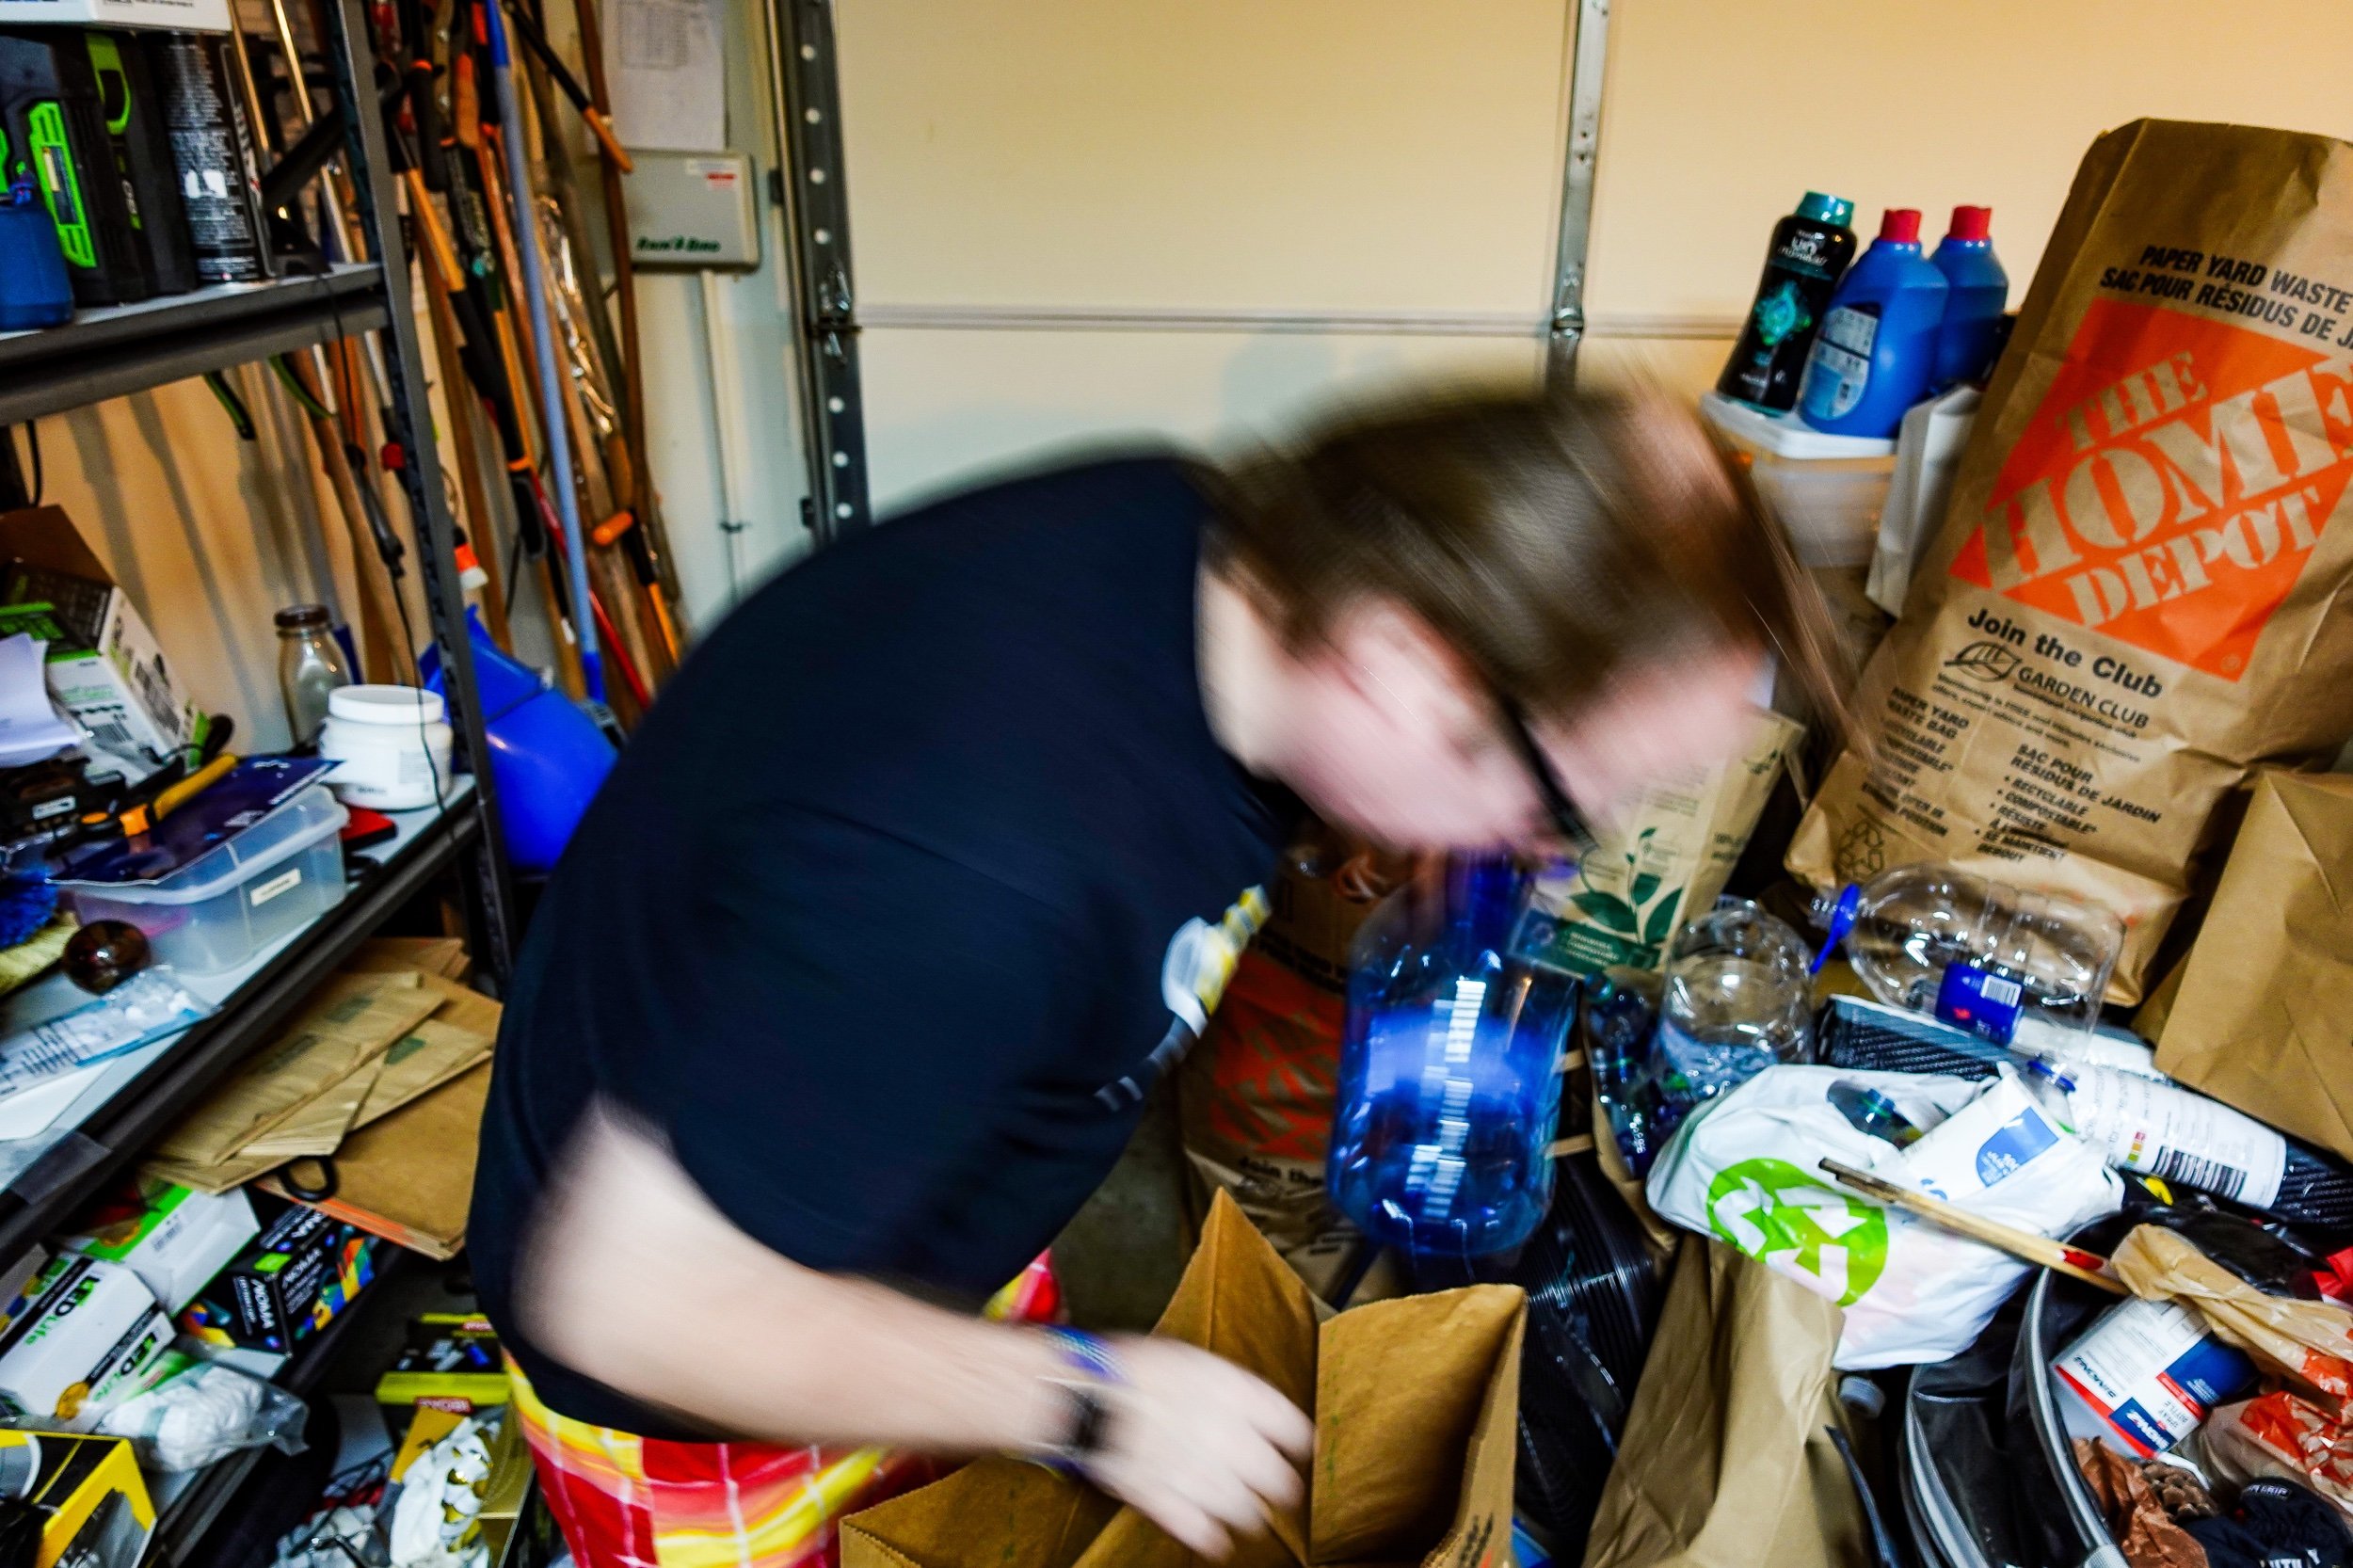
I wanted to create a series that highlighted the claustrophobic feeling I get when I approach this challenge. Using my Sony ZV-1 camera, I shot the series using manual mode, ISO250, with 24mm @ 1/6s in a RAW file format. To keep the camera steady, I did mount it on a tripod. And inspired by Professor Park’s example, I was able to find the settings to start shooting after 4s and to take 5 or 6 shots with the camera having a 4s interval between each shot. My low f-stop also meant I would be blurred as I worked on starting to sort recycling that needs to go to the depot. I think I knew this would happen but then I was pleasantly surprised at the shots where I was blurry. For the first time, I edited the photos in Adobe Lightroom for iPhone. The only downside to this was the inability to batch process the five photos I selected from the two dozen I shot. I had found a lovely recommended preset that the program suggested for the first three photos photos. But I couldn’t figure out how to apply them to the last two photos, as the program recommended totally different presets.

Overall I am happy with these shots. I guess I could have avoided the presets and just edited each photo individually. I’m noticing in the last photo the blues are a bit darker from the early shots.

“It’s important to take self portraits over time, because it will tell your story as it changes… It’s depicting your physical and emotional change(s), and you can look back and remember what you were thinking and feeling at the time. You have a record of each of these times in your life and who you were, and all the facets of who you are as a human.” - Tabitha Park, from her SkillShare workshop, SELF PORTRAITS: TELLING YOUR UNIQUE STORY

These photos were originally posted to Skillshare, 500px, Flickr, Instagram / Instagram, and VSCO.

Certificate of Completion…

The following is my certificate of completion for having completed SELF PORTRAITS: TELLING YOUR UNIQUE STORY.

playing around with contrast: inside a fine art photographic technique

contrast adjustments…

This short journal post is from a presentation I gave in spring 2019 where I discussed how adjusting your contrast can be an interesting way of shooting different subjects and landscapes. This process helps to darken (underexpose) or lighten (overexpose) a scene that I have found can help to add new conceptual meaning to whatever is being photographed.

Ultimately, this is something that can easily be done in camera. Just play around with increasing or decreasing your shutter speed or aperture (f-stop) to create photographs that are purposely under or over exposed. Alternatively, you can shoot a perfectly exposed photo in camera and then fiddle with the contrast in Photoshop, as I did with this photo, titled wal-art 3, of an aisle in Walmart I took in August 2012 and then overexposed it (to make it look brighter than it should) using Photoshop…

wal-art 3

To be completely honest, I had not originally planned to overexpose the images. I only did it after finding out that for some reason, the focus was soft across my images. By overexposing them, you didn’t notice that and it also added a whole other depth to how the content of the photo was presented.

Artist & photographer Paul Graham has also overexposed some of his photographs, as he did with his American Night series of photographs, like this one, American Night #16, from 2000…

wal-art 3

Graham overexposes his photos so much that they at times almost appear ghostly white, with very little of the photo’s original colour left behind. Graham’s American Night photographs formed part of a series of photographs he shot using this technique (as was my wal-art shot, it too is part of a on-going series).

Doing it in camera can be a bit risky as you are ultimately stuck with what you get. If you are at a location you might not be able to return to, it might be better to shoot a perfectly exposed image and then play with it later in Photoshop. Or, if you have time, take a perfectly exposed shot and then take a few shots where you experiment in camera.

making contrast adjustment in photoshop…

If you really want to over or underexpose in Photoshop, here’s where to look:

IMAGE > ADJUSTMENTS > BRIGHTNESS / CONTRAST

This provides a good start, but sometimes it’s not enough so go to the next option…

IMAGE > ADJUSTMENTS > EXPOSURE

Then adjust ‘exposure,’ and possibly adjust ‘gamma correction’ if needed.

Finally, you can also adjust your LEVELS or CURVES (also found in the IMAGE > ADJUSTMENTS drop-down menu). In LEVELS, you can play with the INPUT and OUTPUT LEVELS; and in curves you can adjust, well the curves (Cross Process can be fun too).

More Inspiration…

Unlike other alternative photographic process topics I’ve been exploring, there aren’t many YouTube videos on this specific topic, but I did find one…

This next video gives some solid tips for creating soft and airy photographs by experimenting with some of the ideas talked about here, but also by exploring other elements from lens choice to other camera settings which allow the backgrounds to appear under or over exposed while keeping the main subjects nicely exposed and in focus…